The earlier probe had some problems. For one, sometimes after making contact with the sample it would stick open. While stuck open it triggered EMC2 at the start of the next probe, and the next. This meant that it skipped over much of the area and left stripes in the data.
Also, the old probe took a fair bit of pressure to trigger. The sharp point on the end of the probe combined with the need for the probe to press a little hard on the surface to trigger meant it could mare softer surfaces. This was not really a problem for what I was using it for but it made scanning delicate things impossible.
 | |
| Leaf Switch |
With these two drawbacks of the old design and wanting to get something build quickly and inexpensively I started work. First, I looked in a bunch of old electronic junk I had laying around for some sort of switch. I found a small leaf switch that looked just about right. It is made up of a springy piece of metal with a contact over a ridged piece of metal with a contact. The two contacts are normally touching and very little pressure is needed to break contact.
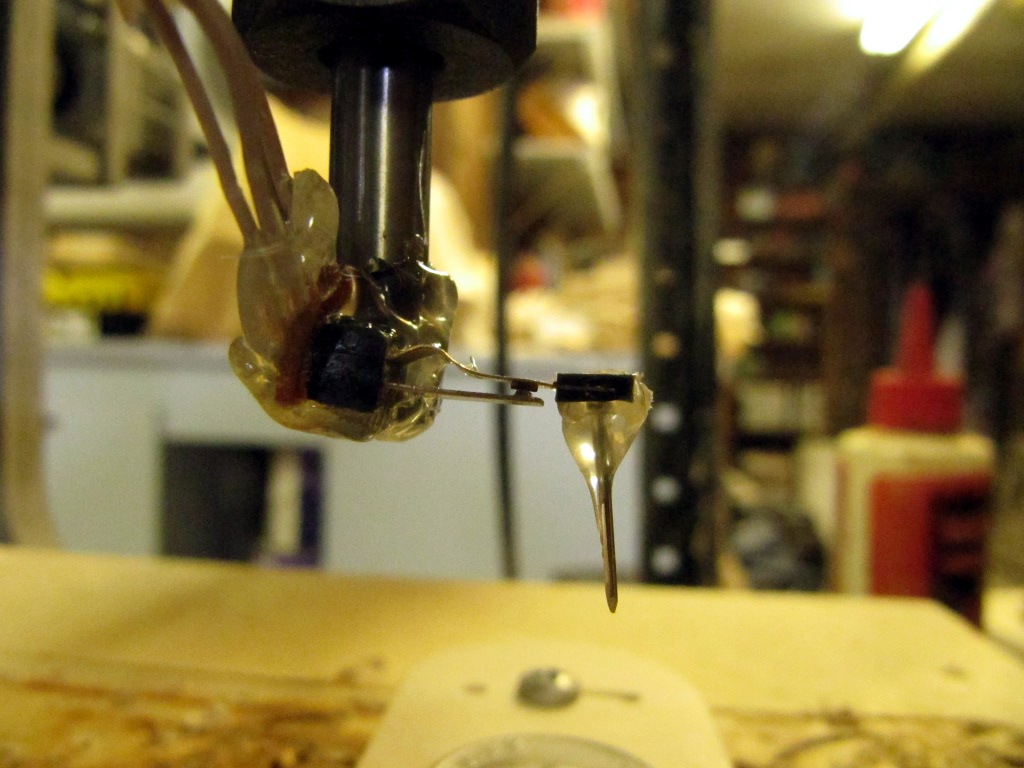 |
| Leaf switch, little nail, broken bit and lots of hot glue. |
To make the probe, I just used a little hot glue to glue a small nail to the springy piece part of the switch. Then I with some more hot glue I glued that all to a broken 1/4" router bit (I have a couple of those floating around unfortunately). I soldered a cable to the contacts on the switch (it takes two conductors, one ground and one for +5V). Then I hooked it up to the motor controller (see my old project on how to do this).
I made a change to the g code for EMC2 to use. It is all well and good that the old code scans a rectangle but I want to scan a dime. The dime is round and using a square pattern takes to much time. So, I broke out the trig I have learned over the years and got the CNC to scan in a circle. Again, it may not be the best example of gcode but it works for me.
<gcode>
G94 f15 ; feed inches/min
#1 = 0.00 ; X min
#2 = 0.00 ; Y min
#3 = 0.740 ; X max 0.99
#4 = 0.740 ; Y max 0.99
#5 = 0.04 ; Z max
#6 =-0.025 ; Z min
#7 = 0.002 ; X step
#8 = 0.002 ; Y step
#12 = #2 ; Y position
#13 = [#3 / 2] ; hypotenuse
G0 Z #5
(PROBEOPEN probeResults.txt)
#12 = [-1 * #13]
O1 Do
#14 = [#13 * cos[asin[ #12 / #13]]] ; end x
#15 = [-1 * #14] ; start x
O2 Do
G0 X #15 Y #12
G38.3 Z #6
G0 Z #5
#15 = [#15 + #7]
O2 While [#15 le #14]
#12 = [#12 + #8]
O4 If [#12 / #13 le 1]
#15 = [#13 * cos[asin[ #12 / #13]]] ; start x
#14 = [-1 * #15] ; end x
O3 Do
G0 X #15 Y #12
G38.3 Z #6
G0 Z #5
#15 = [#15 - #7]
O3 While [#15 ge #14]
O4 EndIf
#12 = [#12 + #8]
O1 While [#12 le #13]
(PROBECLOSE)
G0 Z #5
G0 X #1 Y #2
M2
</gcode>

I scanned a dime and it took all night for the above code to get the job done. The blue in the image of the dime are places where the probe did not contact anything before the end of the probe run. The grey is, of course the dime. The red is where it was triggered at the start of the probe run. I think a bug got stuck under the probe (I was sleeping when it happened).
There are still issues to be dealt with. If you look close the edge of the coin came out pretty jagged. This seams to be because nail I was using as the probe stylus is to flexible. Well, it will give me something to work on.